One Of The Best SEO Tools – Screaming Frog – Part 2
Welcome back! Or, if you only just finished the first part of this blog post, welcome to Part 2!
In the previous article The Best SEO Tool – Screaming Frog – Part 1, I promised that I would help you find some of the biggest potential issues on your website and demonstrate how to do an effective SEO review.
Previously, I explored the significance of this widely used tool, the newly introduced features in the latest version 9.0 of Screaming Frog and revealed the important configuration settings to effectively crawl the site for SEO purposes.
Now the next step is to crawl the website and find the critical issues. Let’s see how.
Crawl The Website
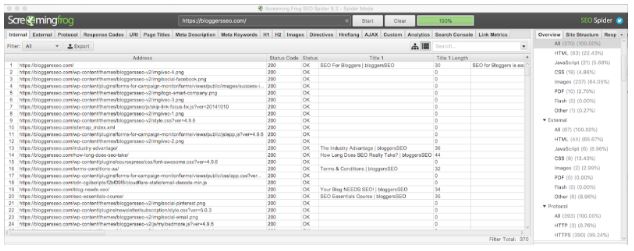
The first step is to crawl the website to 100% by copying or typing the URL into the ‘enter URL to spider’ and click start. The free version of Screaming Frog has limitations to crawl just 500 pages and if a website is facing a never-ending loop or an infinite crawl issue then that is an indication of a serious problem.
Understanding Tabs and Filters
On top of the application, under the logo and URL box, there are around 18 tabs which give you a detailed snapshot of different aspects of SEO for your website. E.g. the first ‘Internal’ tab shows the data for all the internal website pages.

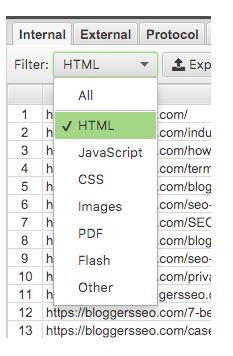
Under each tab, there are different filters available which allow filtering the current tab or table. E.g. under ‘Internal’ tab, there is a set of filters and by selecting ‘HTML’ in the list, the table below will narrow down the results and only show the HTML pages of the website and will hide the rest of the file types. It is useful when you want to review a specific file type, e.g. HTML, PDF or JavaScript.
Internal Tab
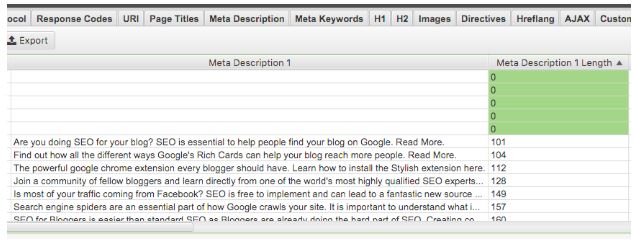
Under the ‘Internal’ tab, there is an overview available for all the internal pages of the website and the information includes ‘Page Title’ content and length, ‘Meta Description’ text and length, H1 and H2 headings and length, Meta Robots tag content, Canonical Links and lots of other useful information. In fact, the internal section combines all the data from other tabs except ‘External’ and ‘Custom’ tab.
It is a quick, top-down look at everything linked internally and I use the Internal tab to find broken and redirected pages quickly. All the columns under the Internal tab have their own dedicated tab with specific filters to identify specific issues.
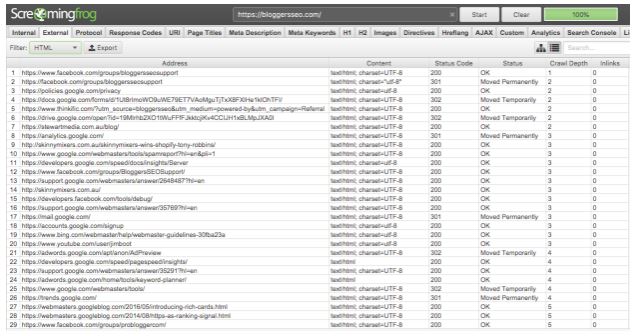
External
The external tab shows you all the external links your website is linking to. Sometimes, an external page gets deleted (404) or moved (301) and if you are still linking to it then it will result in a poor user experience and quality issue. By sorting the Status Code or Status column itself will bring the broken or moved external pages on top to easily find and fix them.
Protocol
The Protocol tab reveals the hypertext transfer protocol data (HTTP Vs HTTPS) that can be used to find which pages are currently on HTTP or HTTPS. It is very important to know if the website is still linking to HTTP protocol pages especially when we have already migrated to HTTPS. The Filter can be used to specify both HTTP and HTTPS links.
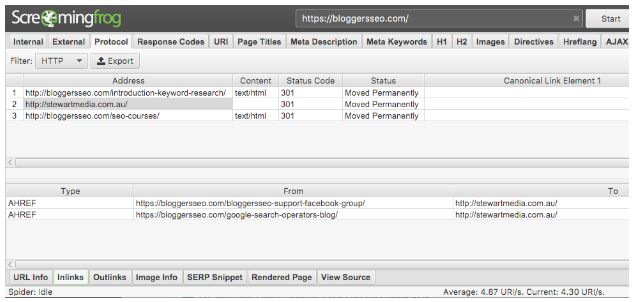
Obviously, you’ll want to know the source of the HTTP protocol links (which URLs on the website link to these HTTP based links), so they can be updated to HTTPS. To do this, simply click on a URL in the top window pane and then click on the ‘Inlinks’ tab at the bottom to populate the lower window pane.
As you can see in this example, there is a HTTP based link to the StewArt Media website (https://stewartmedia.com.au/), which is linked to from this page – https://bloggersseo.com/bloggersseo-support-facebook-group/
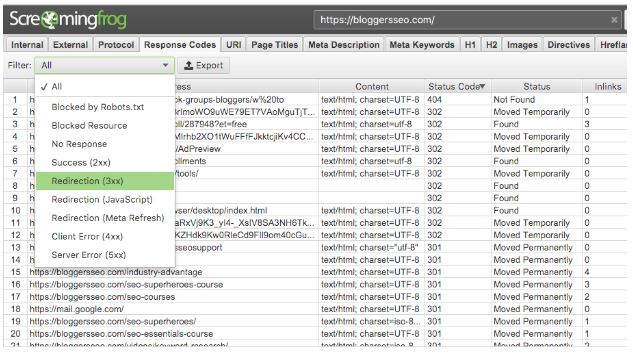
Response Codes
This tab categorises website pages under different response codes and provides response information. With the help of these filters available under ‘Response Codes’ tab, it is easier to spot the pages with critical errors, e.g. broken (4xx), moved (3xx), with server errors (5xx) and blocked by robots.txt.
Get to Work
Phew! That’s it, folks. Over both Part 1 and Part 2 of this article, we’ve shown how to correctly configure the tool according to your needs and how to crawl the site and start finding potential issues that could harm your website’s SEO performance.
However, stay tuned for the third and final part of this series where we’ll explore the rest of the Screaming Frog tabs and their important usage. See you then!

After completing a Masters of Software Engineering in 2005, Ghulam started his career as a web developer and SEO specialist. A committed and dedicated team player with a keen sense of development and management, he focuses on results, client satisfaction and company growth. His goal is to broaden his experience and utilise strong engineering and web development skills in a challenging and progressive environment while at the same time achieving pecuniary benefit.
Ghulam has been working at StewArt Media as an SEO Web Developer & Analyst since 2016.